







A vehicle supported badly is not a minor workshop mistake. It can slip, crush tools, damage sills or suspension components, and seriously injure anyone underneath it. Knowing how to safely lift vehicles starts with treating the jack as a lifting tool, not as the support that keeps the car in the air while you work.
Whether you are changing brake discs, servicing the underside, fitting exhaust parts or carrying out a proper inspection, the same rule applies: lift on solid ground, use the manufacturer-approved jacking points, and support the load with correctly rated axle stands before going underneath.
How to safely lift vehicles: start with the right equipment
The safe setup depends on the vehicle’s weight, ride height and the job being completed. A small hatchback and a heavy SUV may both be lifted with a trolley jack, but they do not place the same demands on the jack, stands or lifting point. Check the vehicle’s gross weight and choose equipment with a load capacity that comfortably exceeds it.
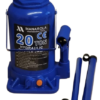
A quality hydraulic trolley jack is the practical choice for most home garages and professional workshops. It offers better control and stability than a compact emergency scissor jack, which is designed for roadside wheel changes rather than prolonged repair work. A low-profile trolley jack is useful on lowered cars, while a long-reach model can make lifting larger vehicles easier and safer.
Axle stands are essential for any work beneath a vehicle. Use a matched pair from a reliable manufacturer, with a stated capacity suitable for the job. The rating is normally given for the pair, so read the product specification rather than assuming each stand carries the full advertised load. Never mix damaged, bent or mismatched stands.
For more regular work, a vehicle lift can improve access, speed and working comfort. It is a serious investment, though, and needs the correct floor, installation space and inspection routine. For occasional servicing, a strong trolley jack and properly rated axle stands remain an affordable, reliable setup.
Check the ground before you touch the jack
A trolley jack and axle stands need a hard, level surface. Smooth concrete is ideal. A sloped driveway, loose gravel, block paving, soil or tarmac softened by heat can allow the jack or stand feet to sink, shift or roll. That turns a routine job into a dangerous one very quickly.
Park with the steering straight where possible, select first gear or park, and apply the handbrake firmly. Chock the wheels that will remain on the ground. If lifting the front, chock both rear wheels. If lifting the rear, chock both front wheels. Use purpose-made wheel chocks where available, as timber offcuts, bricks and loose stones can split or move under load.
Remove loose tools, extension leads and oil containers from around the working area. Good access matters because you need room to position the jack correctly and move the axle stands into place without rushing. If the ground or lighting is poor, postpone the job. No part needs changing badly enough to justify an unstable lift.
Find the correct lifting and support points
The vehicle handbook is the first place to check. It identifies the reinforced jacking points, usually located near the pinch welds behind the front wheels and ahead of the rear wheels. Many vehicles have small markings on the sill or underbody to show these positions.
Do not lift under the floor pan, plastic undertray, fuel tank, exhaust, steering arms or suspension components unless the vehicle manufacturer specifically identifies them as lifting points. These parts may look strong but can bend, crack or shift under the concentrated load of a jack saddle.
When lifting the whole front or rear of the vehicle, there may be a central jacking point on the subframe, axle casing or reinforced crossmember. This varies widely by make and model. Some modern cars have undertrays that hide key structures, while electric and hybrid vehicles may have battery protection trays that must not be used as lift points.
A rubber jack pad can help protect painted pinch welds and prevent the saddle from slipping. It is useful, but it does not make an incorrect lifting point safe. The pad is there to improve contact, not to compensate for poor positioning.
Lift slowly and keep the vehicle balanced
Position the trolley jack so its wheels can roll slightly as the suspension rises. This movement is normal and allows the saddle to stay aligned with the lifting point. A jack pinned against a wall, ramp edge or debris may not move freely, which can pull the saddle off centre.
Pump the handle steadily and watch the contact point as the load comes on. Stop immediately if the saddle begins to slip, the body flexes unusually, or you hear cracking and grinding that is not normal suspension movement. Lower the vehicle, reassess the location and start again.
Lift only as high as the job requires. Excess height does not automatically make a job easier, and it increases the consequences if the setup is not perfectly stable. For wheel removal, raise the tyre just clear of the ground. For underbody work, allow enough height to position axle stands safely and work without placing yourself under strain.
If lifting one end of the vehicle, be aware that the opposite end can move. Keep the unlifted wheels chocked and do not rely on the handbrake alone. On rear-wheel-drive vehicles, raising the rear with the transmission in gear may not provide the resistance you expect, particularly if a wheel can turn through the differential.
Place axle stands correctly every time
Once the vehicle is at the required height, place the axle stands under approved support points. These may be the reinforced sill points, subframe locations or solid axle areas specified by the manufacturer. Set both stands to the same height and make sure their ratchet posts or locking pins are fully engaged.
Lower the trolley jack slowly until the vehicle’s weight sits squarely on both stands. Keep the jack lightly touching a suitable lift point as an additional precaution if space allows, but do not use it as a substitute for stands. The axle stands must carry the vehicle.
Before removing a wheel or getting underneath, test the setup. With both hands, push the vehicle firmly from the side and front. You are checking for movement at the stands, not trying to rock the vehicle off them. A secure vehicle should feel planted. If it shifts, wobbles or makes the stands move, raise it again and correct the problem.
Never work under a vehicle supported only by a hydraulic jack. Seals can fail, valves can leak and a jack can roll or tilt. Never rely on stacked blocks, buckets, wheels laid flat, concrete blocks or improvised supports either. These shortcuts are cheap only until something goes wrong.
Take extra care with heavier and specialist vehicles
SUVs, vans, pick-ups and electric vehicles need more planning. Their weight may be close to or above the capacity of budget lifting equipment, and their higher centre of gravity can make them less forgiving if the ground is uneven. Confirm the actual vehicle weight, including any equipment or load left inside, before choosing a jack or stands.
Electric vehicles deserve particular care because the traction battery is large, expensive and mounted low in the structure. Use only the specified lift points and any required lifting adaptors. Do not guess based on the location of a visible structural rail.
For commercial vehicles and repeated workshop use, consider equipment built for the duty cycle. Heavy-duty trolley jacks, high-capacity axle stands, wheel chocks and proper lifting equipment cost less than downtime, damaged vehicles or an unsafe working area. Affordable professional-grade gear is a sensible purchase when it is rated correctly and used properly.
Lower the vehicle with the same control
Finishing the repair does not mean the risk has passed. Clear people, tools and removed parts from underneath. Raise the vehicle slightly with the trolley jack to take the load off the axle stands, remove the stands one at a time, then lower the vehicle slowly and evenly.
Keep hands and feet clear of the wheels and suspension as the vehicle comes down. Once it is on the ground, remove the wheel chocks last. If wheels have been removed, tighten the wheel nuts to the manufacturer’s specified torque with a torque wrench, not an impact wrench alone.
A safe lift is not about having the most expensive equipment. It is about using correctly rated tools, solid support points and a disciplined routine on every job. Set up carefully, check your work twice, and your garage will stay a place where repairs get done properly.
