






A wheel bearing that starts droning on the road can quickly turn into more than an annoying noise. Left too long, excessive play can damage the hub, upset ABS readings and, in severe cases, affect how securely the wheel runs. Knowing how to replace wheel bearings properly means identifying the bearing design first, using the correct pressing method, and refusing to force parts that are not aligned.
This is a job well within reach of a capable DIY mechanic or busy workshop, but it is not a job for guesswork. The right pullers, presses and sockets save time, protect expensive hubs and help ensure the repair lasts.
Confirm the wheel bearing is the fault
A low hum, growl or rumble that rises with road speed is the usual warning sign. It may become louder or quieter when cornering, as the vehicle weight shifts from one side to the other. A worn bearing can also produce a vibration through the floor or steering wheel, although tyres, driveshafts and brakes can cause similar symptoms.
Raise the vehicle safely, support it on correctly rated axle stands and hold the tyre at the 12 and 6 o’clock positions. Any noticeable movement may point to a worn bearing, but check the ball joints and suspension bushes before ordering parts. Spin the wheel by hand and listen for roughness. A badly damaged bearing often feels gritty or notchy.
Do not rely on noise alone. On some vehicles, especially those with wide tyres or aggressive tread patterns, road noise can sound remarkably like a bearing failure. A road test followed by a proper workshop inspection is the sensible approach.
How to replace wheel bearings: know the assembly type
The procedure depends on what is fitted to the vehicle. There are three common arrangements, and treating them all the same is where costly mistakes begin.
A traditional serviceable tapered roller bearing is common on older vehicles, trailers and some rear axles. It sits inside the hub and is retained by a hub nut, washer, grease seal and often a split pin. These bearings must be packed with the right high-temperature wheel-bearing grease and adjusted correctly.
A pressed-in bearing is fitted into the steering knuckle or rear carrier. The hub is pressed through the bearing centre, and the bearing itself is retained by a circlip. This is a regular job on modern cars, but it needs a hydraulic press or a quality bearing removal and installation kit. Pressing through the wrong race will ruin a new bearing before the vehicle leaves the ramp.
The third type is a bolt-on hub or wheel-bearing unit. The bearing and hub are supplied as one sealed assembly, typically secured from the rear with three or four bolts. These are usually quicker to change, though corrosion can make removal difficult. A slide hammer or hub puller may be needed if the unit is seized into the knuckle.
Before stripping anything down, check the vehicle specification, whether the replacement includes an ABS encoder ring, and the tightening torque for the hub nut or retaining bolts. There is no universal setting. Many modern hub nuts are torque-to-yield and must be renewed, not reused.
Tools that make the job safer and faster
A basic socket set will not cover every wheel-bearing replacement. The exact kit depends on the vehicle, but a prepared workshop should have:
- A trolley jack and axle stands rated for the vehicle, plus wheel chocks.
- Impact sockets, breaker bar, torque wrench and the correct hub-nut socket.
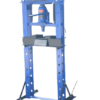
- A bearing press kit or hydraulic shop press with suitable drifts and support blocks.
- Circlip pliers, hub puller or slide hammer, and a wire brush for cleaning mating faces.
- Brake cleaner, penetrating fluid, high-temperature bearing grease where required, and new seals, clips or fasteners.
An impact wrench is useful for loosening a stubborn hub nut, but it should not be used to guess the final torque. Finish all critical fasteners with a calibrated torque wrench. For professional-grade workshop essentials at sensible pricing, Irish Tools Shop stocks the lifting equipment, hand tools and bearing service tools that keep this type of repair moving.
Prepare the vehicle before dismantling
Park on level, solid ground. Apply the handbrake where appropriate, select Park or first gear, and chock the wheels that will remain on the floor. Crack the wheel nuts loose before lifting the vehicle. If the centre hub nut is accessible, loosen it while the wheel is still on the ground, as it may be tightened to a very high torque.
Lift the vehicle at the approved jacking point and place it securely on axle stands. Never work beneath or around a vehicle supported only by a trolley jack. Remove the wheel, then remove the brake caliper and hang it securely so the flexible hose is not stretched. Take off the brake disc and inspect it while access is easy.
If an ABS sensor or wiring clip is attached to the hub or knuckle, disconnect it carefully. Sensor wires become brittle with heat and age, and replacing a snapped sensor adds unnecessary cost to the job.
Removing a pressed-in wheel bearing
On a front-wheel-drive vehicle, remove the driveshaft retaining nut and separate the hub carrier from the components necessary to get it onto the bench. Depending on the suspension layout, this may mean disconnecting the track-rod end, lower ball joint or strut bolts. Mark camber adjustment bolts before removal if fitted.
Once the carrier is removed, press the hub out of the old bearing. In many cases, the inner bearing race stays attached to the hub. Use a bearing splitter and puller to remove it cleanly. Do not attack the hub with a grinder unless there is no alternative and you can avoid damaging the hub surface.
Remove the circlip, then support the carrier squarely in the press. Press the old bearing out using a drift that contacts the outer race. Clean the bearing bore thoroughly, removing rust and debris without scoring the housing. Check the bore for cracks, distortion or heavy corrosion. A damaged carrier may not hold the new bearing securely.
Press the new bearing in by applying force only to its outer race. If it has an integrated magnetic ABS encoder, fit it the correct way around. The encoder side generally faces the sensor, but always confirm with the bearing instructions. Refit the circlip fully into its groove.
When pressing the hub into the new bearing, support the inner race behind it. This is the critical point: pushing the hub in while only supporting the outer race transfers load through the balls or rollers and can brinell the bearing immediately. It may feel smooth at first, then fail early with fresh noise and play.
Refit, tighten and check your work
Reassemble the suspension in the reverse order using new single-use nuts or bolts where specified. Torque the hub nut, suspension fixings, caliper carrier bolts and wheel nuts to the vehicle manufacturer’s figures. If the hub nut requires an angle-tightening stage, use an angle gauge rather than estimating by eye.
Before fitting the wheel, rotate the hub. It should turn freely without roughness, though a seal may add slight resistance. Confirm the ABS wiring is routed clear of the driveshaft, wheel and suspension travel. Refit the wheel, lower the vehicle and tighten the wheel nuts in the correct sequence.
A short road test should be quiet and stable. Check that the ABS warning light goes out and that there is no pull under braking. If the vehicle has disturbed alignment hardware, arrange a wheel alignment check. A bearing replacement does not always require alignment, but moving strut-to-knuckle camber bolts or replacing worn suspension parts can alter it.
When a bolt-on hub unit is the better job
Bolt-on hub assemblies remove the pressing stage, but seized fixings and corrosion can still make the work demanding. Remove the brake components, disconnect the ABS lead, undo the hub mounting bolts from behind and withdraw the unit. Clean the knuckle mounting face until it is flat and free from rust scale before fitting the replacement.
Never use the retaining bolts to pull a new hub unit into a dirty or uneven mounting face. The hub must sit flush. If it does not, stop and clean the surface again. Small amounts of corrosion can create run-out, shorten bearing life and cause brake-disc vibration.
A wheel bearing repair is only as good as the installation. Use parts that match the vehicle, support the correct race when pressing, renew one-use hardware and torque every critical fixing properly. Take the extra ten minutes to do those checks, and the repair should stay quiet for the miles that matter.
