






A brake pedal that travels too far, feels spongy or needs pumping is not a job to postpone. To bleed brakes safely, you need more than a length of clear hose and a bottle. You need the correct brake fluid, stable vehicle support, a controlled bleeding order and a final leak check that leaves no doubt about pedal feel.
For busy garages and capable DIY mechanics, brake bleeding is a straightforward service task when the system is treated properly. Take shortcuts around lifting, fluid specification or ABS procedures, however, and a routine repair can turn into a poor pedal, damaged paintwork or a vehicle that should not be on the road.
Why brake bleeding needs a controlled approach
Brake fluid is designed to work under extreme pressure, but it attracts moisture over time. Water lowers its boiling point and can contribute to internal corrosion. Air in the hydraulic circuit is a separate problem: unlike brake fluid, air compresses. That compression is what creates a soft or inconsistent pedal.
You may need to bleed the brakes after replacing a caliper, flexi hose, wheel cylinder, master cylinder or brake pipe. It is also part of a proper fluid change at the vehicle manufacturer’s recommended interval. If a reservoir has run dry, assume more care is required. Air may have entered the master cylinder or ABS hydraulic unit, and a basic wheel-by-wheel bleed may not be enough.
The goal is simple: fresh, correct fluid throughout the system, no trapped air and no leaks under pedal pressure. A firm pedal alone is not the only pass mark. It must remain firm while held down, and every union, hose and bleed nipple must stay dry.
The equipment to bleed brakes safely
The right tool choice saves time and reduces the chance of pulling air back through a nipple thread. A pressure brake bleeder is usually the most efficient option for workshop work. It keeps the reservoir supplied and applies steady pressure, allowing one person to work around the vehicle. A vacuum bleeder is useful too, particularly for quick jobs, but it can show bubbles caused by air passing around the nipple threads rather than air inside the brake line.
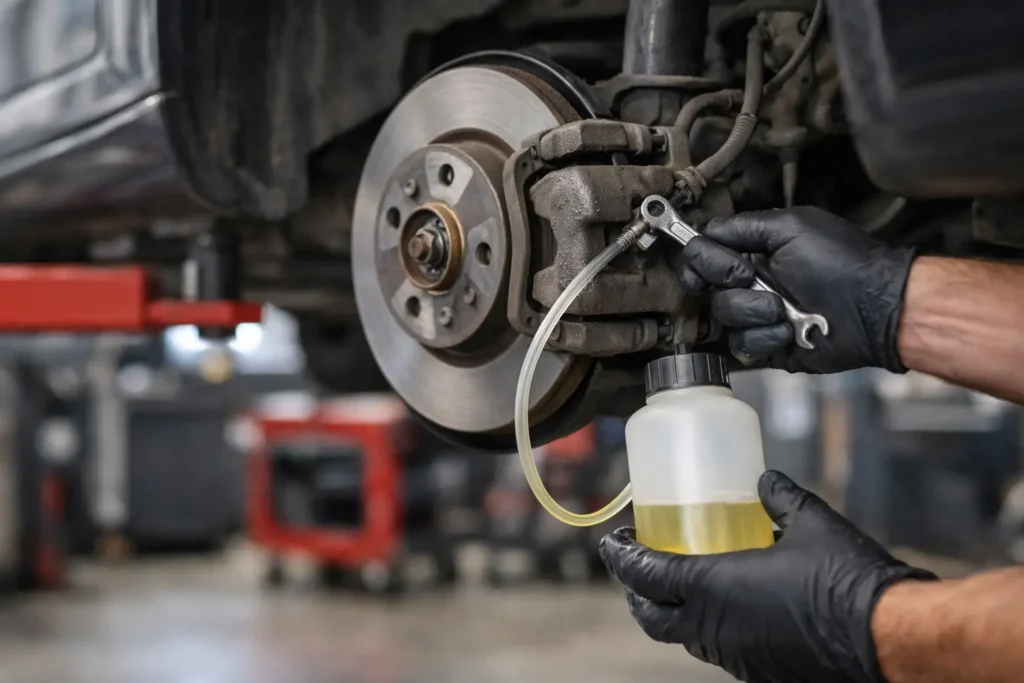
For a conventional two-person method, use clear bleed hose that fits the nipple securely, a clean catch bottle and a proper flare-nut or ring spanner where access allows. Do not use an adjustable spanner on a seized bleed nipple. Rounded fittings cost time and often mean replacing the caliper or cylinder.
Have the manufacturer-specified brake fluid ready before opening the system. DOT 3, DOT 4, DOT 4 LV and DOT 5.1 are not a guessing game. Check the vehicle cap, handbook or workshop data. DOT 5 silicone fluid is generally not compatible with glycol-based fluids and should never be added simply because the number looks higher.
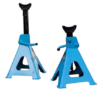
You will also need wheel chocks, a trolley jack rated for the job, axle stands and gloves. Brake fluid damages paint, so keep clean water and absorbent cloths nearby. Wipe spills immediately and never reuse fluid collected from the bleed bottle.
Prepare the vehicle before opening a nipple
Park on level, solid ground. Select Park on an automatic or first gear on a manual, apply the parking brake where appropriate and chock the wheels that remain on the ground. Loosen wheel bolts slightly before lifting if wheels need to come off.
Lift only at the approved jacking points and support the vehicle on correctly rated axle stands. Never work beneath a vehicle held only by a trolley jack. For access to all four corners, a properly maintained vehicle lift is faster and more practical, but the same rule applies: position the arms at the specified lift points and confirm the vehicle is stable before work starts.
With the bonnet open, clean the area around the brake fluid reservoir before removing its cap. Dirt dropped into the reservoir can cause expensive trouble later. Check the fluid level and condition. Very dark fluid, debris in the reservoir or a level that is unexpectedly low should prompt a closer inspection for worn pads, leaks or a fault that bleeding alone will not cure.
Inspect each bleed nipple before turning it. Remove the rubber cap, brush away corrosion and apply penetrating fluid if needed. A nipple that feels seized should be dealt with carefully. Excess force can snap it off. Replacing a corroded nipple is cheaper than replacing a damaged caliper body.
How to bleed brakes safely step by step
Confirm the correct bleeding sequence
Do not assume every vehicle follows the old rule of starting at the wheel furthest from the master cylinder. Many vehicles do, but split diagonal circuits, rear-biased systems and modern ABS arrangements can have a different specified order. Use vehicle data where available.
If no special procedure is specified, a common sequence is rear right, rear left, front right, then front left on a right-hand-drive vehicle. The exact route through the hydraulic circuits matters more than tradition.
Keep the reservoir supplied at all times
Fill the reservoir only with fresh fluid from a sealed or recently opened container. During manual bleeding, check the level after every few cycles. During pressure bleeding, fill the pressure bleeder as instructed and monitor its pressure and fluid supply.
Do not let the reservoir run dry. Once air is drawn into the master cylinder, the job becomes longer and may require bench bleeding or a manufacturer-specific procedure. A reservoir level that falls rapidly can also point to a serious external leak. Stop and investigate rather than continuing to pump fluid through a failed component.
Bleed each corner cleanly
Fit the clear hose tightly over the bleed nipple and place its other end below the surface of a small amount of clean brake fluid in the catch bottle. This helps prevent air travelling back up the tube during a manual bleed.
With a second person, ask them to press the pedal slowly and hold it down. Open the nipple just enough to allow fluid and air out, then close it before the pedal is released. Repeat until clean fluid runs through with no genuine bubbles. Avoid fast, aggressive pedal pumping, especially on older master cylinders. Forcing the piston into an unused, corroded section of the bore can damage the internal seals.
With a pressure bleeder, apply only the pressure recommended by the tool and vehicle information. Excessive pressure can damage reservoir seals or force fluid out around the cap adaptor. Open one nipple at a time, allow fluid to run until it is clean and bubble-free, then tighten the nipple to the specified torque. Move methodically around the vehicle.
A vacuum bleeder can be a fast alternative, but interpret bubbles carefully. If bubbles continue indefinitely while the pedal is firm and fluid flows cleanly, seal the nipple threads lightly or switch method before assuming there is air trapped in the system.
Treat ABS and electronic systems differently
Some ABS-equipped vehicles need a diagnostic tool to cycle valves or run the pump after the system has been opened, particularly if the master cylinder or ABS hydraulic unit has been replaced. A normal bleed may improve the pedal without removing air from every chamber.
Do not improvise on these systems. Follow the manufacturer procedure, including any ignition position, scan-tool function and bleed sequence. If the required equipment is unavailable, this is the point to send the vehicle to a garage with the correct diagnostics.
Checks that separate a proper repair from a quick flush
Once all nipples are closed, set the reservoir level to the marked maximum line and refit the cap. Clean every caliper, wheel cylinder, flexi hose connection and master cylinder area. Then ask an assistant to apply firm pedal pressure while you inspect each corner. No fluid should appear anywhere.
With the engine off, the pedal should feel firm and should not slowly sink when held. Start the engine and expect some drop as brake servo assistance comes in, but the pedal must still feel controlled and consistent. If it sinks, feels long or needs pumping, do not road test the vehicle. Recheck for leaks, wrong bleed order, a low reservoir, trapped air or a master cylinder fault.
Before refitting wheels, inspect pads, discs, hose condition and pipe corrosion. Brake work often reveals related wear that should be addressed while the vehicle is already raised. Refit wheels, tighten wheel bolts to the specified torque and remove axle stands safely.
Common mistakes that waste time and compromise safety
The biggest error is using the wrong fluid or mixing unknown fluid types. The next is allowing the reservoir to empty. Both can turn a short brake job into a full system repair.
Other avoidable mistakes include bleeding with the vehicle supported only by a jack, opening nipples too far, using contaminated fluid, overtightening nipples and relying on a five-minute drive as the only final test. Never release a vehicle because the warning light is off. Hydraulic integrity and pedal feel must be proven first.
If a nipple is badly corroded, a pipe fitting is wet or the pedal remains inconsistent after a correct procedure, stop. Replacing the faulty part is the safe and cost-effective decision. Brake fluid cannot fix mechanical wear, internal seal failure or a leaking line.
A reliable brake service starts with stable lifting equipment, correct fluid and a brake bleeding kit that suits the work. Spend a few extra minutes checking the system before the wheels go back on. That is the difference between finishing a job and knowing the vehicle is ready for the road.
