






A brake pedal that feels soft, travels too far or slowly sinks under pressure is not a fault to ignore. Air in the hydraulic system reduces braking response, and the fix is often straightforward if you know how to bleed brake calipers properly. Work cleanly, use the specified brake fluid and follow the correct bleeding order for the vehicle.
Brake fluid is unforgiving of poor preparation. It damages paintwork, absorbs moisture from the air and must never be reused once it has been drained into a catch bottle. Give yourself enough room, keep the reservoir topped up throughout the job and do not rely on a trolley jack alone – axle stands are essential.
When brake calipers need bleeding
You should bleed the brakes after replacing a caliper, flexi hose, brake pipe, master cylinder or any component that has opened the hydraulic system. It is also sensible after a fluid change, when the pedal has become spongy, or when old brake fluid has absorbed moisture.
A firm pedal does not always mean the system is perfect. Brake fade, a sticking caliper, worn pads, warped discs and a failing master cylinder create different symptoms. Bleeding removes trapped air and old fluid; it will not cure a mechanical defect. Check for leaks around pipe unions, hoses, calipers and the master cylinder before starting. If fluid is escaping, repair the fault first.
Tools and materials for the job
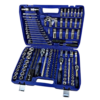
A basic two-person bleed needs a ring spanner that fits the bleed nipple, clear hose, a suitable catch bottle and fresh brake fluid. A pressure bleeder or vacuum brake bleeder can make the work quicker, particularly in a busy garage or when working alone.
You will also need wheel braces, a trolley jack, axle stands, gloves, eye protection, brake cleaner and rags. Use only the fluid specification stated on the reservoir cap or in the vehicle handbook, commonly DOT 4 or DOT 5.1 on many modern cars. DOT 5 silicone fluid is not interchangeable with DOT 3, DOT 4 or DOT 5.1 glycol-based fluid. Mixing the wrong products can damage seals and compromise braking performance.
A six-point ring spanner is preferable to an adjustable spanner because bleed nipples round easily. If nipples are heavily corroded, clean them first and use penetrating fluid carefully. Snapping a bleed nipple in a caliper turns a simple service job into a repair or replacement job.
How to bleed brake calipers step by step
Park on level ground, engage first gear or Park, apply the handbrake where appropriate and chock the wheels that remain on the floor. Loosen the wheel bolts before lifting the vehicle. Raise it using the approved jacking point, then lower it securely onto axle stands. Remove the wheels to give clear access to every caliper.
Open the bonnet and clean around the brake fluid reservoir cap. Dirt dropped into the reservoir can contaminate the hydraulic system. Check the fluid level and fill it to the MAX mark with fresh fluid. Leave the cap loose during conventional bleeding, unless your vehicle procedure says otherwise.
The bleeding sequence matters. Many vehicles use the wheel furthest from the master cylinder first, often rear right, rear left, front right and front left on right-hand-drive cars. However, this is not universal. Some cars with split hydraulic circuits, ABS units or unusual pipe routing require a different order. Use the workshop manual for the exact vehicle rather than guessing.
Push a clear hose firmly over the first bleed nipple and place the other end in a catch bottle with a small amount of clean brake fluid in the bottom. This helps stop air travelling back up the tube. Ask your assistant to press the brake pedal slowly three or four times, then hold firm pressure on it.
With the pedal held down, crack the bleed nipple open by around a quarter turn. Old fluid and air bubbles will travel through the hose. Close the nipple before your assistant releases the pedal. This order is critical: open while pressure is applied, close before the pedal comes up.
Repeat the process until the fluid runs clean and bubble-free. Check the reservoir every few cycles and top it up before it gets near the MIN mark. Letting it run dry pulls air into the master cylinder and can mean starting again from the beginning.
Once that corner is complete, tighten the nipple securely, wipe away fluid and fit its dust cap. Move to the next caliper in the specified sequence. When all four corners are finished, fill the reservoir to the correct level, refit the cap and clean any spilled fluid immediately with water followed by brake cleaner where suitable.
Using a pressure or vacuum bleeder
A pressure bleeder connects to the reservoir and pushes fresh fluid through the system at controlled pressure. It is usually the cleanest and most consistent option for a one-person job. Do not exceed the pressure recommended by the tool or vehicle manufacturer – excessive pressure can damage the reservoir or force fluid out around the cap.
A vacuum bleeder pulls fluid through from the nipple. It is quick for fluid replacement, but it can draw air past the bleed nipple threads and create a stream of misleading tiny bubbles in the hose. If the pedal remains soft despite apparently endless bubbles during vacuum bleeding, seal the nipple threads lightly or switch to pressure bleeding or the two-person method.
Whichever tool you use, keep the reservoir level under control and use a catch container large enough to avoid overflow. Good brake service equipment pays for itself when it saves time, prevents mess and helps produce consistent results.
ABS systems and difficult pedal problems
Most routine caliper bleeding jobs do not require diagnostic equipment. But if the reservoir ran dry, the ABS hydraulic unit was replaced, or air has entered the ABS modulator, the system may need an ABS bleed routine operated through a suitable diagnostic scanner. The scanner cycles internal valves and pump circuits that normal pedal bleeding cannot always clear.
Do not repeatedly pump the pedal hard to the floor on an older master cylinder in an attempt to fix a soft pedal. The seals can travel into a corroded section of the bore and fail. Use controlled, steady strokes instead. If the pedal still feels poor after correct bleeding, inspect the system again for leaks, hose swelling, incorrect caliper installation or rear brake adjustment issues.
Final safety checks before the road test
With the wheels still off, inspect each bleed nipple, hose connection and caliper for fresh fluid. Refit the wheels, tighten the wheel bolts to the manufacturer torque setting and lower the vehicle. Pump the brake pedal until it becomes firm before starting the engine.
With the engine running, the pedal may drop slightly as the servo assists, but it should still feel solid and should not sink continuously. Test the brakes first at very low speed in a safe area. Check that the vehicle stops straight, the warning light stays off and there are no leaks after the test.
Brake work is no place for shortcuts. Use fresh fluid, stable lifting equipment and properly fitting tools, then take the extra few minutes to inspect your work. For dependable workshop essentials at practical prices, Irish Tools Shop keeps the equipment serious DIY users and working garages need close at hand.
