






A seized bolt can turn a ten-minute brake, suspension or exhaust job into an expensive repair. Corrosion locks the threads, heat cycles tighten the joint, and one rushed pull on the wrong spanner can round the head or snap the fixing clean off. Knowing how to remove seized bolts is less about brute force and more about using controlled force in the right order.
For working garages and serious DIY mechanics, the aim is simple: free the bolt while protecting the component, threads and surrounding parts. Start gently, build up methodically, and stop before a stubborn bolt becomes a drilling job.
Why bolts seize in the first place
Most seized bolts are the result of rust, galvanic corrosion or repeated heat cycling. On vehicles, road salt and moisture work their way into exposed threads, particularly around suspension arms, brake brackets, exhaust systems and underbody fasteners. Aluminium housings are another common trouble spot, as steel bolts can corrode into the softer metal.
A bolt may also feel seized when it is actually thread-locked, overtightened or damaged. That distinction matters. Penetrating fluid can help with corrosion, but it will not dissolve a high-strength threadlocker quickly. Heat may soften threadlocker, while a damaged thread may need to be worked back and forth rather than forced straight out.
Before applying serious torque, inspect the bolt head, the access around it and what the bolt is threaded into. A snapped bolt in a replaceable bracket is inconvenient. A snapped bolt in an aluminium engine block, hub carrier or gearbox casing is a different level of job.
Get the right tools in place first
Using a poor-fitting tool is often what turns a recoverable fastener into a rounded one. A quality six-point socket grips the flat sides of a bolt head far better than a twelve-point socket, especially when corrosion has reduced the head size. For external Torx, spline and Allen fasteners, clean the recess fully before fitting the correct bit.
Keep the following close by before you start:
- Penetrating fluid and a wire brush
- Six-point impact sockets and a breaker bar
- A ratchet, extensions and wobble extensions where access is tight
- A hammer and punch for shock-loading the fixing
- A heat source suitable for the area being worked on
- Bolt extractors, left-hand drill bits and thread repair tools for escalation
An impact wrench can be excellent for seized bolts because its repeated hammer action shocks corrosion without placing one long, twisting load on the fastener. It is not automatically the best first move, though. If the bolt head is already weak, heavily rusted or partly rounded, an impact tool can finish it off quickly. Use a correctly sized impact socket, start with short bursts, and avoid hammering away blindly.
How to remove seized bolts step by step
Clean the fastener and soak the threads
First, remove loose rust and dirt from the bolt head, exposed threads and surrounding area with a wire brush. This gives the socket a better seat and lets penetrating fluid reach the joint instead of sitting on a layer of grime.
Apply penetrating fluid around the bolt head, washer and exposed thread. If the bolt passes through a bush, bracket or captive nut, treat both sides where possible. Leave it to work for at least 10 to 20 minutes. On heavily corroded suspension or exhaust hardware, repeated applications over several hours can make a genuine difference.
Do not confuse penetrating fluid with lubricant. It helps creep into corrosion, but it needs time. Spraying it on and immediately leaning on a breaker bar rarely gets the benefit.
Seat the socket properly and shock the joint
Fit a six-point socket squarely over the bolt head. Push it fully home, then tap the socket lightly with a hammer to ensure it is seated. A few firm taps directly on the bolt head can also help break the rust bond. This shock-loading is especially useful on bolts threaded into steel brackets or cast iron components.
Apply torque steadily rather than jerking the breaker bar. Keep the bar in line with the bolt as much as possible. Side loading, particularly with long extensions, can slip the socket or damage the fastener head.
If the bolt will not move, try tightening it by a very small amount first. That sounds backward, but a tiny tightening movement can crack the corrosion before you reverse the bolt out. Once it moves, work it back and forth in small increments. Add more penetrant as it begins to turn.
Use heat only where it is safe
Heat is one of the most effective answers to a seized bolt, but it must be used with care. Heating the surrounding metal makes the threaded hole or nut expand slightly, reducing its grip on the bolt. It can also break down threadlocker.
Use an induction heater where suitable, particularly around vehicle work, as it heats the fastener without an open flame. A blowtorch can work well on robust, clear steel parts, but never use it near fuel lines, petrol tanks, brake hoses, wiring looms, rubber bushes, underseal, aerosol residue or sealed components. Keep suitable fire safety equipment nearby and allow the area to cool before applying more penetrating fluid.
Heat the nut or component around the bolt rather than the bolt itself. Once hot, allow a short cooling period, then try turning the bolt with a good socket. Several controlled heat-and-cool cycles are often safer than one extremely hot attempt.
Choose leverage carefully
A longer breaker bar gives more torque, but more torque is not always the answer. If you can feel the bolt twisting rather than moving, stop. The same applies when the bolt head starts deforming or the socket begins to lift. A snapped bolt usually costs more time than changing approach early.
For a bolt threaded into aluminium, use progressive force and keep checking for movement. Aluminium threads are easier to strip than steel. If access allows, applying small back-and-forth movements while keeping the fixing lubricated is usually safer than one hard pull.
An impact wrench is often the better next step for sound fasteners with adequate clearance. Use short bursts and check after each one. On wheel, suspension and chassis bolts, a heavy-duty impact socket set is worth having because standard chrome sockets can crack under impact use.
When the bolt head is rounded or damaged
Once a bolt head rounds, stop using an ordinary socket. Repeated attempts will remove more material and reduce your options. A bolt extractor socket can bite into the damaged head and is usually the cleanest recovery method. Hammer it on squarely, then use a ratchet or impact wrench with controlled force.
If there is enough of the bolt head exposed, locking pliers may help, but only when they can clamp tightly and stay square. They are rarely effective on a deeply recessed bolt or one with severe corrosion.
For internal Allen, Torx or spline bolts, remove rust from the recess with a pick and compressed air, then tap the correct bit fully into place. In some cases, carefully hammering in the next-size-up Torx bit provides enough grip to remove a damaged Allen bolt. This is a recovery technique, not a first choice, and it can make the bolt unusable afterwards.
If the bolt snaps
A snapped bolt is not always a disaster, but the recovery method depends on how much remains exposed and what it is threaded into. If the broken stud protrudes, soak it, apply heat to the surrounding material where safe, and use locking pliers or two locked nuts to turn it out. Avoid gripping the very end of a weak stud if it will simply twist off again.
If the break is flush or below the surface, centre-punch the exact middle before drilling. This is critical. A drill that wanders into the parent metal can damage threads or the component itself. Start with a small left-hand drill bit at low speed using cutting fluid. The reverse action may catch the broken fixing and wind it out before an extractor is needed.
Screw extractors have their place, but they must be used cautiously. An extractor that snaps inside a bolt is hardened and difficult to drill, often creating a far worse repair. Use one only after drilling a centred pilot hole of the correct size, and never force it. If it does not turn with sensible pressure, move to drilling the bolt out and repairing the thread with a tap or thread insert.
On safety-critical locations such as brake calipers, steering components, wheel hubs and suspension mounts, replace any damaged fixing with the correct grade, length and specification. Do not refit a stretched, heavily corroded or extractor-damaged bolt because it happened to come out.
Prevent the next seized bolt
Prevention starts when you reassemble the job. Clean reusable threads with a wire brush or thread chaser, then use the manufacturer’s specified torque. Overtightening is a common reason bolts seize or fail on the next service.
Use the right compound for the application. Anti-seize can help on suitable high-temperature or exposed fittings, such as certain exhaust fasteners, but it changes friction and can alter clamping force. Do not apply it automatically to every bolt, especially wheel fasteners, torque-to-yield bolts or threads where the manufacturer specifies threadlocker. Where threadlocker is required, use the correct grade on clean, dry threads.
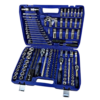
A dependable socket set, breaker bar, impact tools and extractor kit cost far less than lost workshop time, damaged components or a recovery job that runs late. Keep the tools matched to the work, use force in stages, and most seized bolts will come out without breaking the day’s schedule.
