







A bench vice only works as well as the surface beneath it. A heavy-duty vice can grip a seized suspension component, hold steel for cutting or keep a part steady while you file it – but not if the bench flexes, the bolts loosen or the jaws sit in the wrong place. Knowing how to mount bench vice properly saves frustration, protects your workbench and gives you the solid holding power the tool was bought for.
This is a straightforward workshop job, but positioning and fixings matter. Take the time to fit it once, and your vice will be ready for years of repair, fabrication and general garage work.
Choose the right bench before mounting a vice
Start with the bench, not the vice. The mounting surface needs to carry the force created when you tighten the handle, saw through metal, hammer a component or bend steel in the jaws. A lightweight flat-pack bench may be fine for sorting hand tools, but it is not the right base for a large engineer’s vice.
A proper workbench should be heavy, rigid and fixed so it cannot walk across the floor. Steel-framed benches with a thick timber or steel top are ideal. A solid hardwood top is also suitable, provided it is thick enough and properly supported underneath. For a vice used regularly on vehicle parts, aim for a top around 40 mm thick or reinforce a thinner top with a substantial steel plate or timber bearer.
The bench must not rock. Tighten its frame bolts, level the feet and, where possible, secure the bench to a wall or floor. Bolting a vice to an unstable bench simply moves the weak point further down the setup.
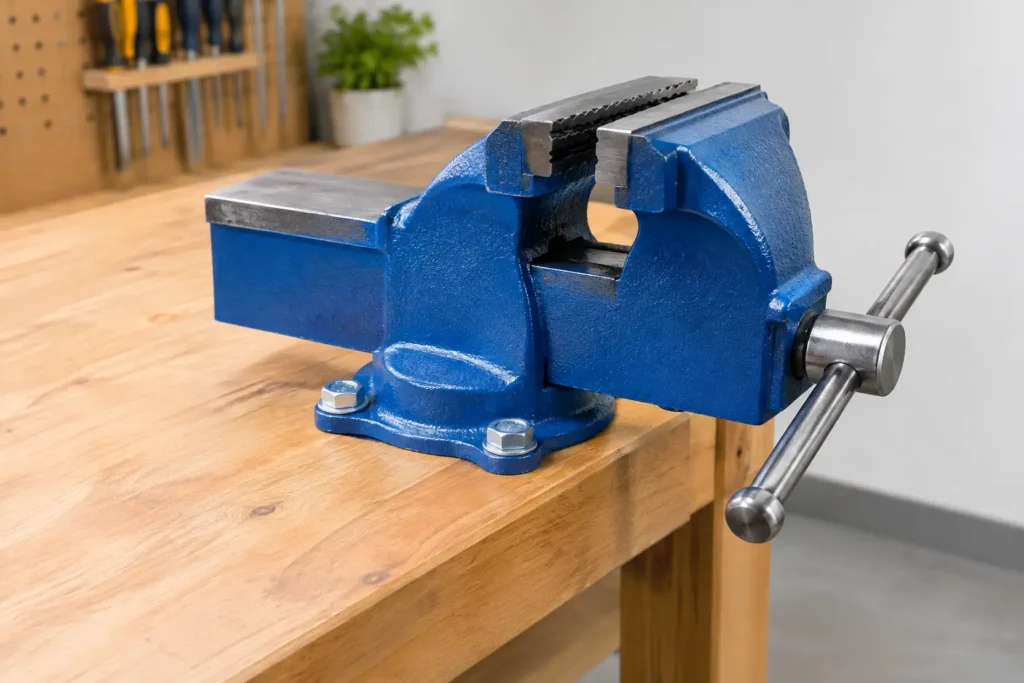
150mm Fixed Base Bench Vice With Hardened & Tempered Carbon Steel Jaws
Where to position a bench vice
Most workshops mount the vice near one end of the workbench, with the fixed jaw close to or slightly beyond the front edge. This gives you room to clamp long pipe, bar or sheet material vertically without the bench getting in the way.
For a right-handed user, the left-hand end of the bench is often the practical choice. It leaves the handle and moving jaw clear while you work along the length of material. Left-handed users may prefer the opposite end. There is no fixed rule – check that you can operate the handle freely and stand comfortably in front of the jaws.
Before drilling, place the vice where you intend to fit it and test the working area. Open the jaws fully. Swing the handle through its full arc. Hold a length of timber or steel in the jaws to see whether it clears the floor, wall, drawers and other equipment. If the vice has a swivel base, allow enough space for it to rotate without striking the back of the bench.
Avoid mounting it in the middle of a long worktop unless access from both sides is essential. A central position can restrict long workpieces and wastes usable bench space. The corner or end position is generally stronger too, because it is closer to the bench legs and frame.
Check the mounting holes and select the bolts
Your vice base will usually have three or four mounting holes. Measure their diameter before buying bolts. The correct bolt size depends on the vice, but M10, M12 and M16 bolts are common on medium and large workshop vices. Do not force an oversized bolt through the casting, and do not rely on undersized fixings with oversized washers.
Use high-tensile hex bolts or coach bolts of the appropriate diameter, with flat washers under both the bolt head and nut. A wide washer spreads the load and reduces the chance of the bolt head or nut pulling into a timber top. For regular heavy work, use nyloc nuts or spring washers to help resist vibration.
Bolt length matters. It must pass through the vice base, bench top, washers and nut with several threads showing beyond the nut. A bolt that is too short will not fully engage the nut. One that is excessively long is untidy and can catch on drawers, knees or stored equipment below the bench.
For a timber bench, fitting a steel plate beneath the worktop is a worthwhile upgrade. It distributes clamping and hammering loads across a larger area. If a plate is not practical, use a thick timber reinforcing block securely fixed between the underside of the top and the bench frame.
Do not use wood screws, drywall fixings or self-tapping screws. They may appear secure for light use, but they are not suitable for the twisting force created by a vice. Through-bolts are the dependable choice.
How to mount bench vice step by step
Once the position and fixing hardware are ready, fitting the vice is simple. It is easier and safer with a second person, particularly if you are mounting a heavy cast-iron model.
Mark and drill accurately
Set the vice in its final position, with the fixed jaw aligned as you want it. Use a pencil, marker or transfer punch to mark every mounting hole. Remove the vice and check the marks against the base one more time before drilling.
Drill pilot holes first, especially through a timber top. Then drill to the final diameter required for your bolts. Keep the drill square to the bench so the bolts pass through cleanly. With steel worktops, use a sharp metal drill bit, cutting fluid and a slower drill speed. Wear eye protection, and remove swarf before placing the vice back on the bench.
If you are fitting a reinforcing plate underneath, drill it at the same time or use the worktop as a template. Deburr the holes so the plate sits flat.
Fit the bolts and washers
Lift the vice into position and insert the bolts from the top where possible. Place a flat washer, spring washer if used, and nut underneath. If the underside is difficult to access, coach bolts can be useful because their domed heads leave a tidy, snag-free finish on top.
Tighten each nut gradually in sequence rather than fully tightening one bolt at a time. This keeps the base evenly seated against the bench. The vice should sit completely flat with no visible gap under the mounting flange.
Use a spanner or socket to tighten the bolts firmly. There is no benefit in overtightening to the point that you crush timber fibres or distort a thin bench top. If you are mounting to steel, tighten to the bolt manufacturer’s recommended torque where available. After the first few heavy jobs, check every fixing again, as timber can compress slightly and allow the nuts to settle.
Test the installation under load
Open and close the jaws several times. The handle should turn smoothly and should not strike the bench. Clamp a piece of timber, then a piece of steel, and apply moderate pressure. Watch the bench and the vice base for movement.
A small amount of flex in a timber worktop is not unusual, but the vice itself must not shift, twist or lift. If it moves, stop and correct the problem before using it for serious work. Usually the answer is tighter fixings, larger washers or better reinforcement below the bench.
Swivel bases, removable mounts and special setups
A swivel-base vice is useful when you regularly work on awkward shapes or need to angle a component. Mount it so the locking levers remain accessible. Keep the swivel base locked when sawing, filing, hammering or applying high torque; an unlocked base can move unexpectedly.
A removable mount makes sense where bench space is limited. A steel mounting plate can be bolted to the vice and secured to the bench with heavy-duty bolts or a purpose-built receiver plate. This is useful for multi-purpose home garages, but it introduces another point that can flex or loosen. For daily workshop use, a permanent through-bolted installation remains the strongest option.
If your workbench has a drawer unit directly under the top, plan around it before drilling. You may need to shift the vice slightly, use shorter bolts with a reinforcing plate, or modify the drawer layout. Do not compromise the bolt arrangement merely to avoid moving stored tools.
Common bench vice mounting mistakes
The most common mistake is fitting a powerful vice to a weak bench. The next is placing it too far back from the edge, which makes vertical clamping awkward and forces long workpieces against the bench. Loose bolts, small washers and unreinforced chipboard tops are also frequent causes of movement.
Another issue is treating the vice as an anvil. Some models include a small anvil surface behind the jaws, but even then, heavy striking sends shock through the mounting bolts and bench. Use controlled blows and make sure the bench is braced. For substantial fabrication work, a steel fabrication table may be the better tool for the job.
Keep the screw clean and lightly lubricated, clear metal filings from the jaws, and inspect the mounting bolts as part of normal workshop maintenance. A vice that starts to move will only get worse under load.
A correctly mounted bench vice turns an ordinary workbench into a dependable repair station. Spend a little extra on proper bolts, wide washers and reinforcement where needed – it is cheaper than replacing a damaged bench, and far safer when the job needs real holding force.
