






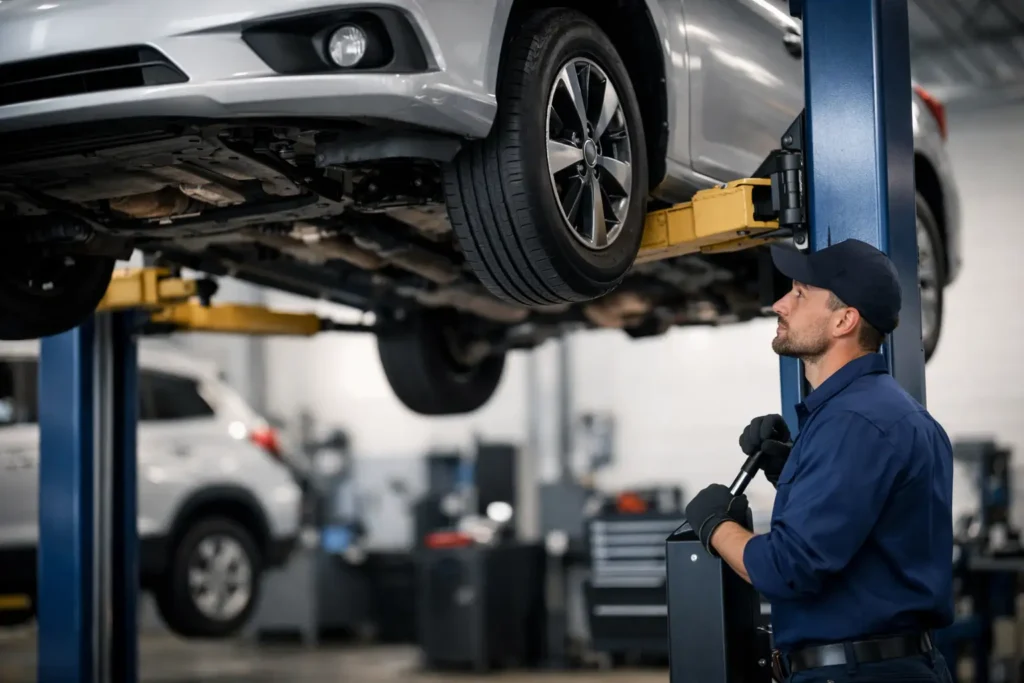
A two-post lift saves time on brakes, suspension, exhausts and underbody repairs, but only when the vehicle is supported at the correct points. Knowing how to use the two post lift properly is not simply a matter of pressing the raise button. It means matching the vehicle to the lift, setting every arm correctly, using the safety locks and refusing to rush a stability check.
Start with the lift, vehicle and working area
Before a vehicle enters the bay, check that the lift is suitable for the job. Read the lift’s rated capacity plate and compare it with the vehicle’s actual gross weight. Do not rely on a rough estimate, and do not assume a large-looking vehicle is within capacity. Electric vehicles, long-wheelbase vans, pick-ups and vehicles carrying tools or equipment can be considerably heavier than expected.
Capacity is only one part of the check. Confirm that the vehicle’s wheelbase, lifting-point layout and ground clearance suit the lift and its supplied arms or pads. Low cars may need approved low-profile pads. Some vans, 4x4s and chassis-cab vehicles require height extensions, frame-contact adapters or manufacturer-specific lifting instructions. Never improvise with timber blocks, loose metal plates or damaged rubber pads.
The floor around the lift should be dry and clear of jacks, axle stands, air lines, creepers and loose tools. Keep other people out of the lifting area. A technician beneath a raised vehicle needs a clean exit route, not a trolley jack or a tool chest blocking the way.
Inspect the lift before use, especially if it is shared by several people. Look for hydraulic oil leaks, damaged cables or chains, worn arm-lock teeth, cracked pads, bent arms and loose anchors. Test that the arm restraints engage correctly and that both columns rise evenly. If anything is damaged, noisy or operating unevenly, take the lift out of service until it has been checked by a competent person.
How to use the two post lift: position the car correctly
Drive the vehicle slowly into the bay and centre it between the posts. This matters more than it first appears. A vehicle parked too far forward, rearward or to one side can leave an arm at an unsafe angle or put excess loading on one side of the lift.
Use the lift manufacturer’s vehicle positioning guidance, particularly on asymmetric lifts. These are designed to place the vehicle’s centre of gravity slightly behind the columns while allowing the doors to open more easily. A symmetric lift is positioned differently and is commonly used for more evenly balanced vehicles. Treat each design as its own system rather than copying the method used on another lift.
Select neutral or park, apply the parking brake and switch off the engine. Check that nobody remains inside the vehicle and that there are no passengers, pets or loose loads in the cabin. Doors, tailgates and bonnet should be closed before lifting unless the repair requires access. If a door must be opened later, do it carefully and only after checking it will not contact a post.
Move all four arms under the vehicle. Position each pad at the approved lifting points shown in the vehicle handbook, workshop data or on the manufacturer’s lifting-point labels. On monocoque cars, these are often reinforced sill pinch welds. On body-on-frame vehicles, they may be specified chassis points. The correct point is the one given by the vehicle manufacturer, not simply the strongest-looking section you can see.
Avoid fuel tanks, battery cases, brake pipes, coolant lines, floor pans, plastic undertrays and suspension components unless the manufacturer specifically approves them as lifting points. This is especially relevant on EVs, where poor pad placement can damage the battery enclosure and create a very expensive repair.
Raise slowly and perform the shake test
Once all four pads are correctly placed, raise the vehicle only 100 to 200 mm from the ground. Stop. At this height, every pad should be making full, square contact, with the arms locked in position. Check from each side that no pad has slipped off a pinch weld or contacted trim, undertrays or a non-structural panel.
Now carry out a firm stability check. Push the vehicle at a strong point such as a tyre or bumper area to see whether it rocks, shifts or settles. The aim is not to force it off the pads, but to identify poor balance before the vehicle is high enough to cause damage or injury. If it moves, lower it completely and reposition it. Never try to adjust an arm or pad while the vehicle is suspended.
If the vehicle is stable, raise it to the required height while watching both sides. Stop if one end rises differently, an arm changes angle, a pad begins to crush, or the lift makes an unusual sound. Keep hands, feet and tools away from the moving arms, lifting carriage and pinch points.
At working height, lower the lift gently on to its mechanical safety locks. Hydraulic pressure should raise and lower the lift, but the safety locks are what support the load during the repair. Do not work beneath a vehicle hanging only on hydraulic pressure. Make sure both sides are fully engaged at the same lock position before going underneath.
Working safely under a raised vehicle
A correctly lifted vehicle can still become unstable if the job changes its balance. Removing an engine, gearbox, axle, fuel tank, battery pack or heavy suspension assembly can shift the centre of gravity significantly. Check the repair procedure before starting and support the vehicle with approved supplementary equipment where required.
For example, removing a rear axle or a large battery may make the vehicle front-heavy or rear-heavy. An engine support bar, transmission jack or approved support stand may be needed, but these tools do not replace correct lift-pad placement. They are there to manage the component or changing load during the repair.
Do not use the lift arms as a mounting point for pulling, hammering or levering. Heavy impact work can disturb pad contact, particularly on corroded vehicles or awkward chassis shapes. Recheck stability after a major force has been applied or after removing a heavy part.
Keep the lift controls clear and prevent unauthorised use. In a busy garage, another person pressing a control at the wrong time is an avoidable risk. Good workshop practice means one technician is responsible for the lift while the vehicle is being worked on.
Lowering the vehicle without damaging it
Before lowering, inspect underneath the vehicle. Remove axle stands, transmission jacks, oil drainers, tools, parts trays and creepers. Check that brake lines, wiring, exhaust sections and suspension parts are reassembled or secured well enough for lowering. Also look around the posts and under the arms for anyone standing too close.
Raise the vehicle slightly to take its weight off the mechanical locks. Release the locks using the lift’s normal control method, then lower slowly. Keep watching the vehicle until it is close to the floor. The arms can swing as the suspension takes weight again, so make sure they cannot catch a tyre, sill or door.
Once the tyres are on the ground, lower fully, retract the arms clear of the vehicle and only then drive out. Leaving arms extended into a working aisle is a trip hazard and an easy way to damage a lift arm with the next vehicle entering the bay.
Inspection, servicing and operator discipline
A two-post lift is heavy-duty workshop equipment, not a fit-and-forget purchase. Follow the manufacturer’s service schedule for lubrication, hydraulic checks, cable or chain adjustment, pad replacement and safety-lock inspection. Keep service records and arrange statutory inspections or thorough examinations as required in your location, workplace and insurance policy.
Operators should be trained on the exact lift model in the workshop. Controls and safety systems vary, and a technician who understands one lift should not assume another has identical arm restraints, lowering valves or lock-release arrangements. Display the rated capacity and key operating rules where they can be seen from the controls.
When choosing workshop lifting equipment, focus on more than the headline price. Capacity, lifting height, minimum pad height, arm reach, installation requirements, available spare parts and warranty support all affect the real value of the lift. Irish Tools Shop supplies affordable, reliable workshop equipment for garages that need dependable gear without unnecessary distributor mark-up.
The safest lift routine is also the quickest over a full working week: inspect, position, pad, raise a short distance, test stability, lock off and check the bay before lowering. Make those steps non-negotiable and the two-post lift becomes the time-saving workshop tool it is meant to be.
